SCIM
The System for Cross-domain Identity Management (SCIM) is a protocol for provisioning and managing identity data on the web.
Datafisher strongly recommends the Microsoft Graph-based solution where the LMS pulls the relevant data from Entra ID via the Datafisher Azure application.
This allows better client and end user support that does not need input from client IT.
SCIM should be considered if the Entra ID user attributes contain sensitive data that must not be made available to Datafisher. Please note that in any case only previously agreed data is stored in the LMS.
Prerequisites (provided by Datafisher):
- SCIM endpoint (
Tenant URL) - secret token
Results (to be provided to Datafisher):
- (none)
- Users are never deleted, but marked as blocked instead. Users will be deleted according to the data retention rules defined in the LMS.
- When users are updated individually (not part of a bulk update request), there may be a minor delay before all their assignments and group memberships are available.
- The LMS data validation rules are also applied to the imported users, for example:
- email addresses must be unique;
- either email address or employee ID (when used) must be provided;
- etc.
- The SCIM endpoint may be limited to a subset of users available in the LMS (e.g. only a certain division, only internal users).
SCIM setup
First, the Datafisher Azure application needs to be set up.
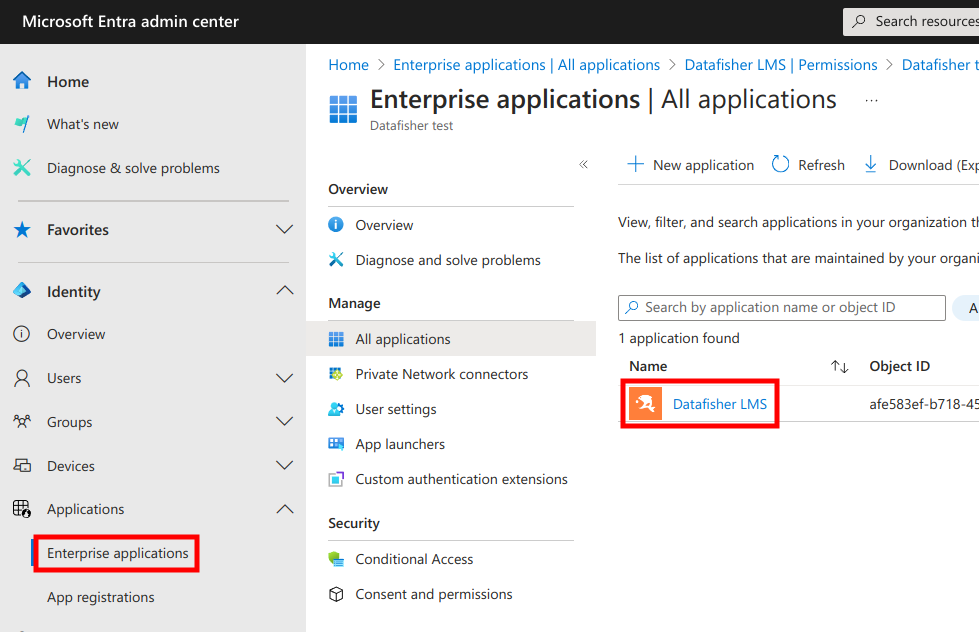
Next, in the Microsoft Entra admin center you need to navigate to Enterprise Applications and select Datafisher LMS:
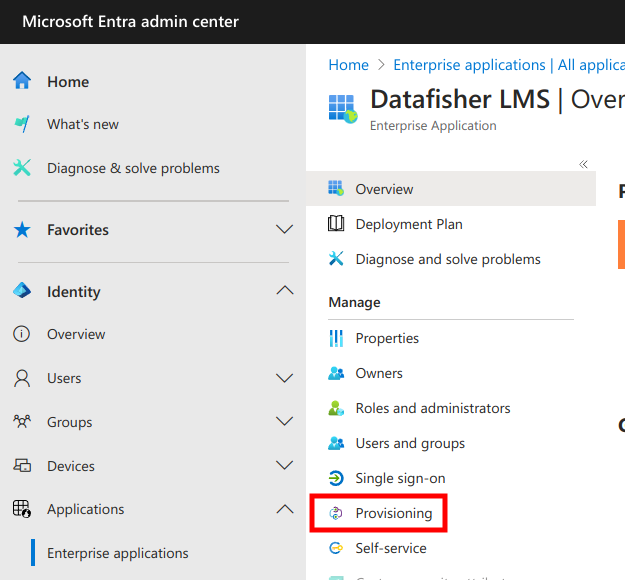
Next, select Provisioning from the menu.
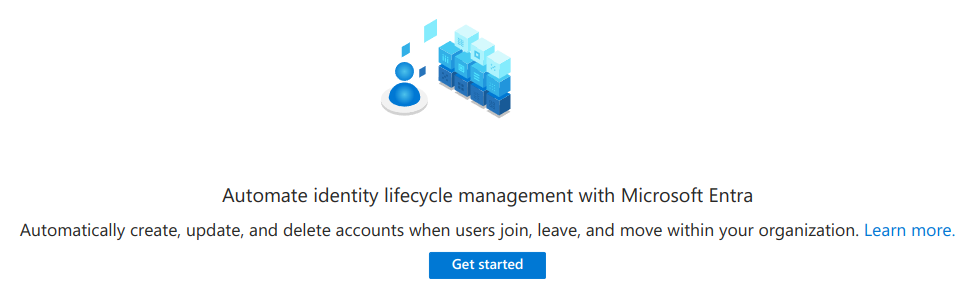
Next, get started.
Set up connection
Next, set Provisioning mode to Automatic and fill in the Tenant URL and Secret token.
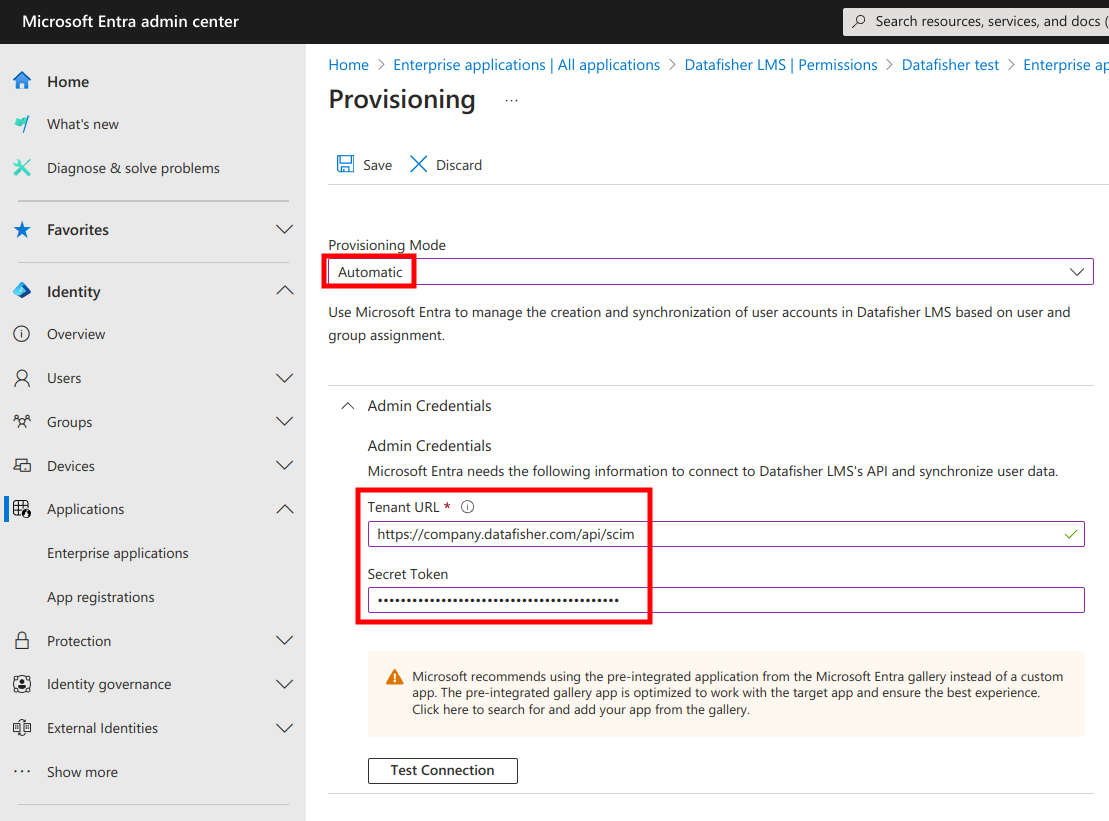
Next, test the connection. You should see a success message at the top right of the page.

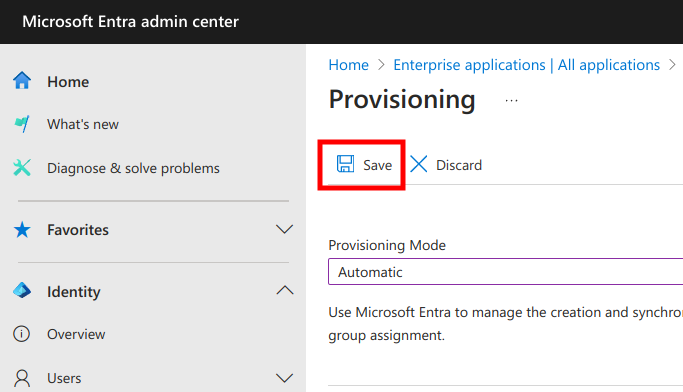
Next, save the configuration.
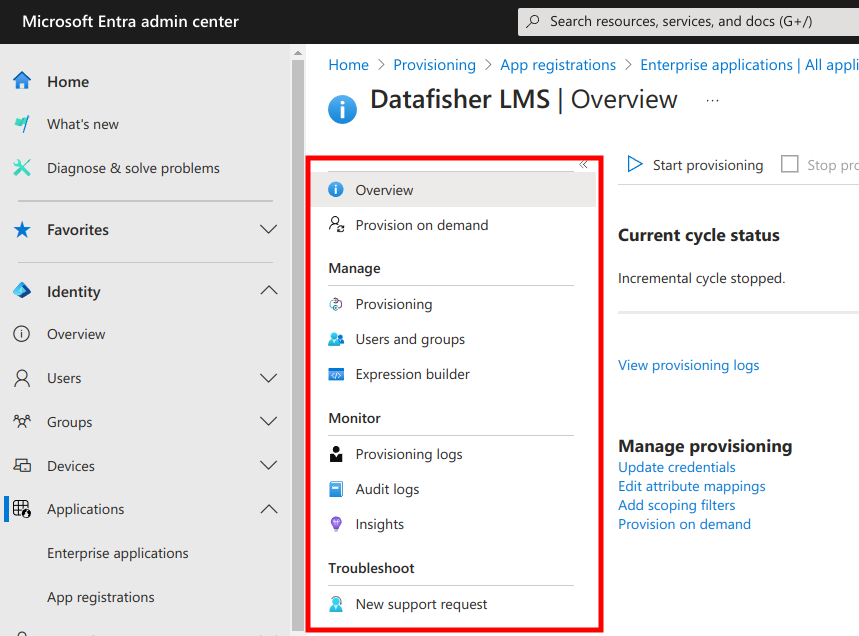
Next, you may need to re-navigate to the Provisioning page for the provisioning menu to become visible:
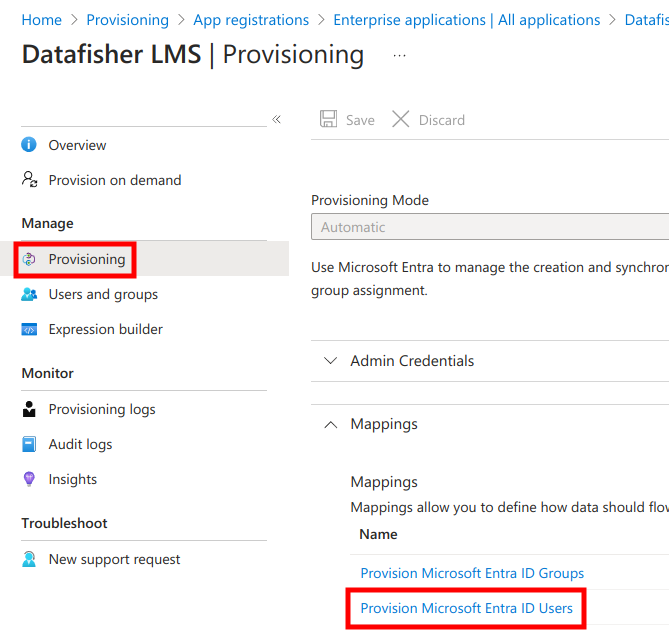
Update user mappings
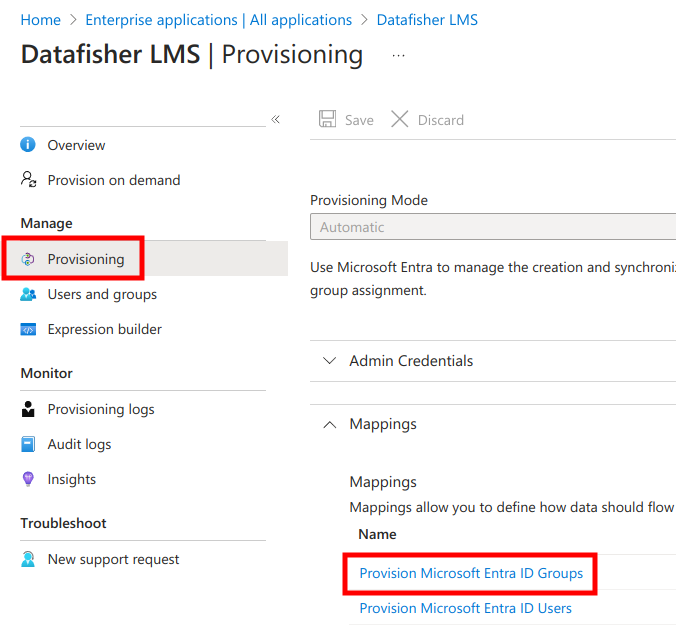
Next, under Provisioning open the Mappings section and select Provision Microsoft Entra ID Users.
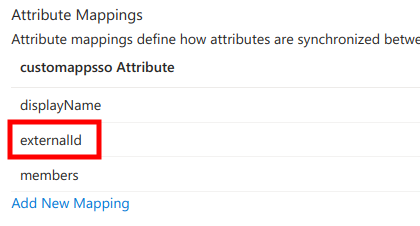
Next, under Attribute mappings find externalId and click Edit.
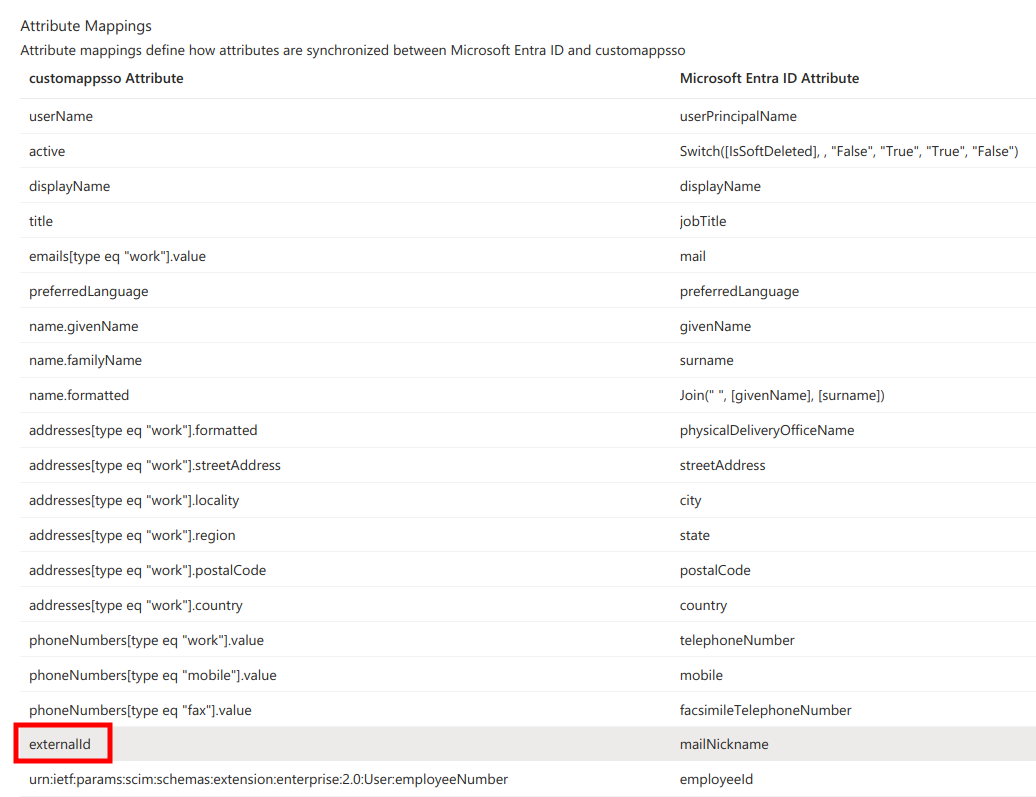
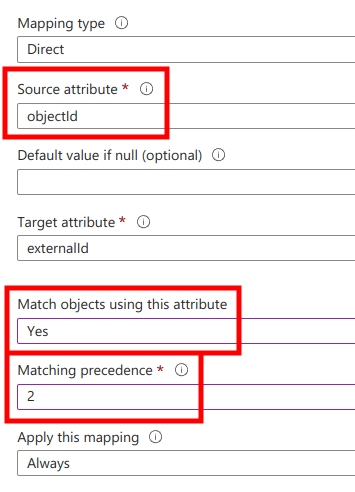
Next,
- change the
Source attributetoobjectId - set
Match objects using this attributetoYes - set
Matching precedenceto2
and click Ok at the bottom of the page.

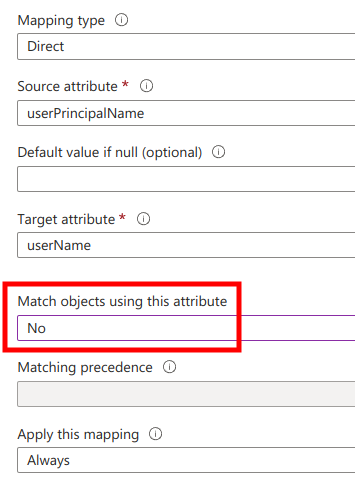
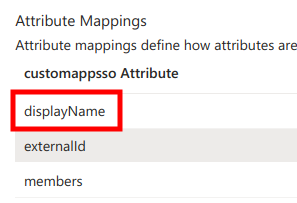
Next, in the Attribute Mappings list find userName and click Edit.
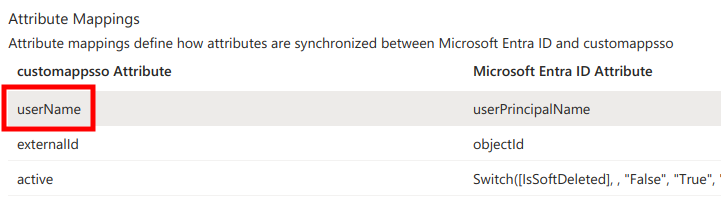
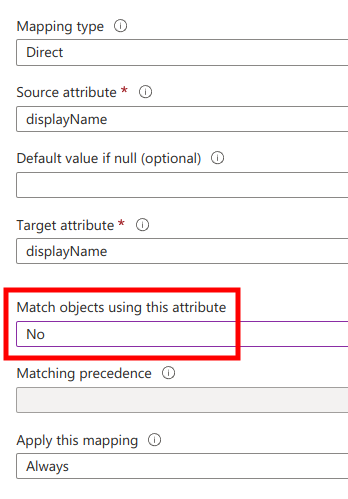
Next, set Match objects using this attribute to No and click Ok at the bottom of the page.
Next, in the Attribute Mappings list remove some unsupported attributes:
name.formatteddisplayName- all
addresses* - all
phoneNumbers*
which should leave only:
userNameactivetitleemails[type eq "work"].valuepreferredLanguagename.givenNamename.familyNameexternalIdurn:ietf:params:scim:schemas:extension:enterprise:2.0:User:employeeNumberurn:ietf:params:scim:schemas:extension:enterprise:2.0:User:departmenturn:ietf:params:scim:schemas:extension:enterprise:2.0:User:manager
Additionally, remove the following fields if they are not enabled in the LMS for your company:
title(job title)urn:ietf:params:scim:schemas:extension:enterprise:2.0:User:employeeNumber(employee ID)urn:ietf:params:scim:schemas:extension:enterprise:2.0:User:department(department name)
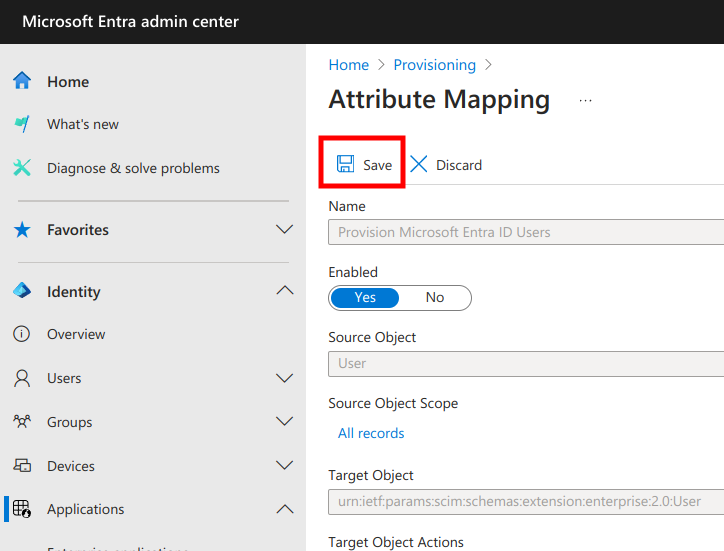
Next, save the changes.
Custom attributes
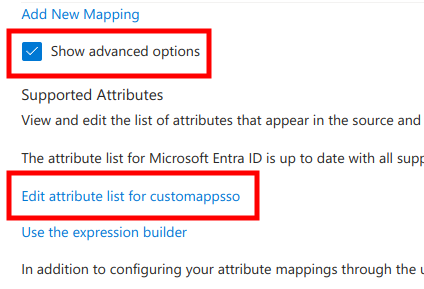
In case custom fields need to be added, you need to check Show advanced options and click Edit attribute list for customappsso.
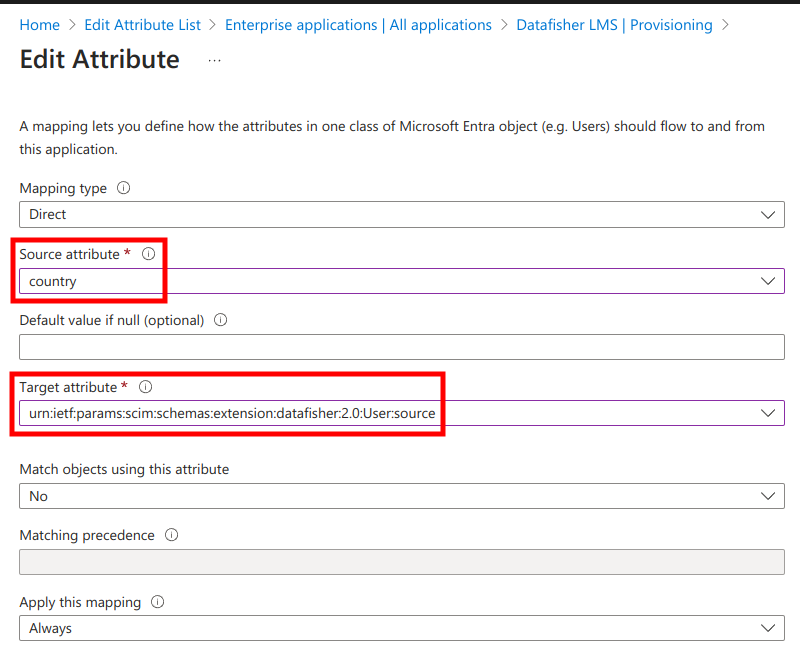
At the bottom of the page fill in the Name and Type fields according to what Datafisher has provided. The Name could be urn:ietf:params:scim:schemas:extension:datafisher:2.0:User:source, for example.
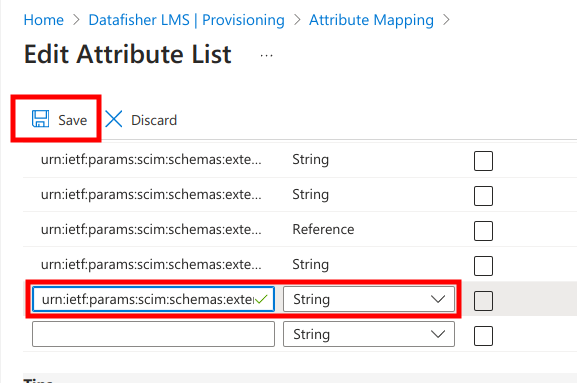
Next, in the Attribute Mappings list click Add New Mapping and select the relevant Source attribute and Target attribute. You may need to refresh the page if you are unable to find the Target attribute you just added.
Next, save changes on the Attribute Mapping page and navigate back to the Provisioning page.
Update group mappings
Next, under Provisioning management open the Mappings section and select Provision Microsoft Entra ID Groups.
Next, in the Attribute mappings table find externalId and click Edit.
Next,
- make sure
Source attributeisobjectId - set
Match objects using this attributetoYes - set
Matching precedenceto2
and click Ok at the bottom of the page.
Next, in the Attribute Mappings list find displayName and click Edit.
Next, set Match objects using this attribute to No and click Ok at the bottom of the page.
Next, save changes on the Attribute Mapping page and navigate back to the Provisioning page.
Assign users
It is possible to provision either all users or only a part of them.
Provisioning all users (not recommended)
In order to provision all users, navigate to the Provisioning management page, find the Settings section, and change Scope to Sync all users and groups.
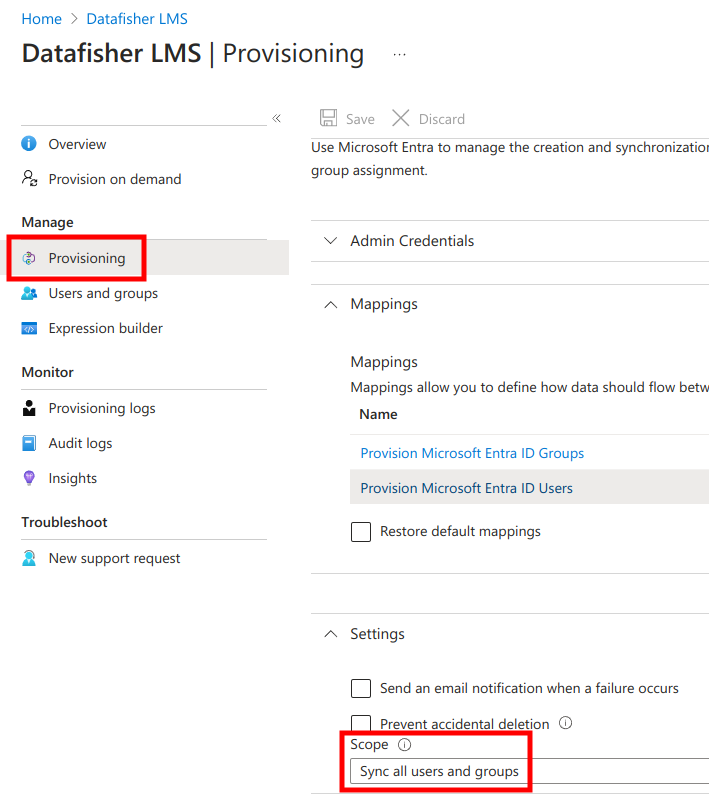
Next, click Save at the top.
Provisioning only selected users (recommended)
In order to provision all users, navigate to the Provisioning management page, find the Settings section, and change Scope to Sync only assigned users and groups.
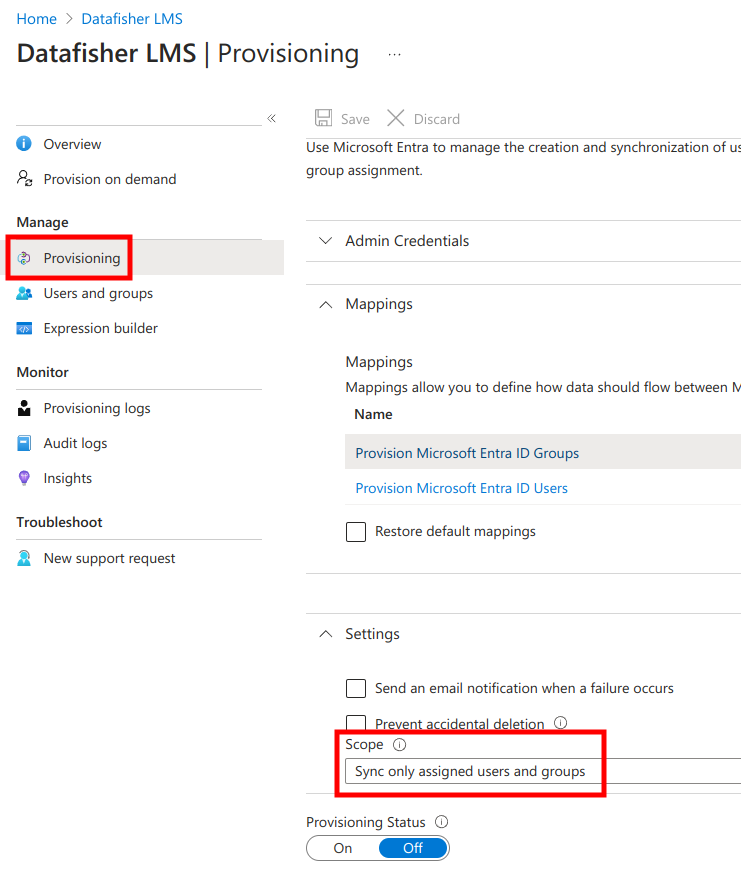
Next, click Save at the top.
Next, navigate to the Users and groups management page and click Add user/group.
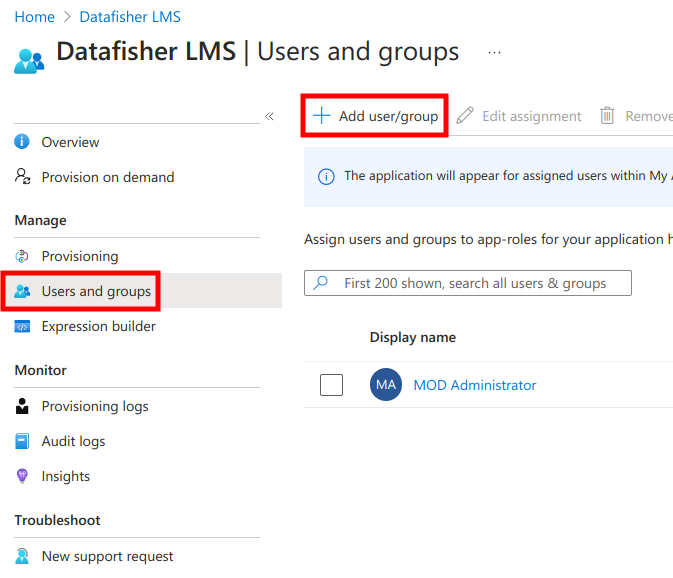
Next, click on None selected.

Next, select the relevant groups and click Select. Those groups will also be available in the LMS for assignment and reporting purposes.
You should at least select the group that contains all people i.e. excludes all noreply@, support@, etc addresses.
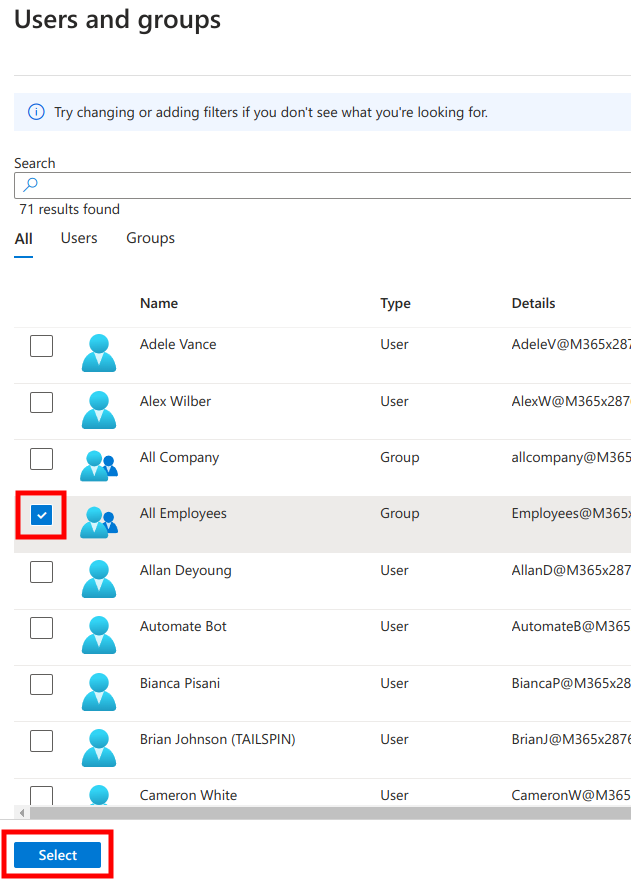
Note that when you assign a group, nested groups will not be included.
Next, click Assign at the bottom of the page.
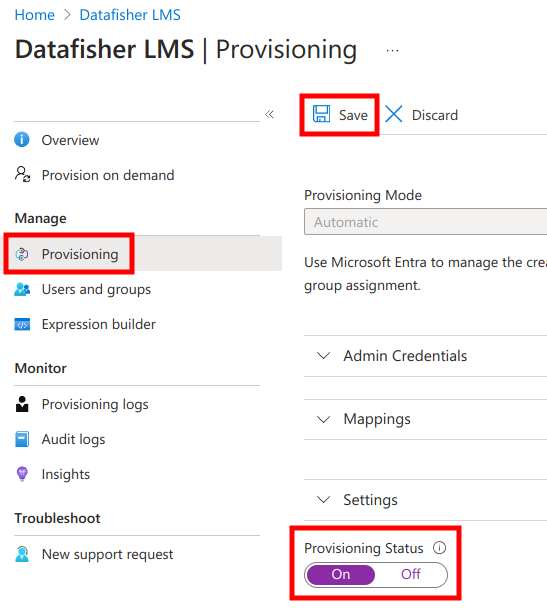
Turn on provisioning
Next, navigate back to the Provisioning management page, turn on provisioning, and click Save.
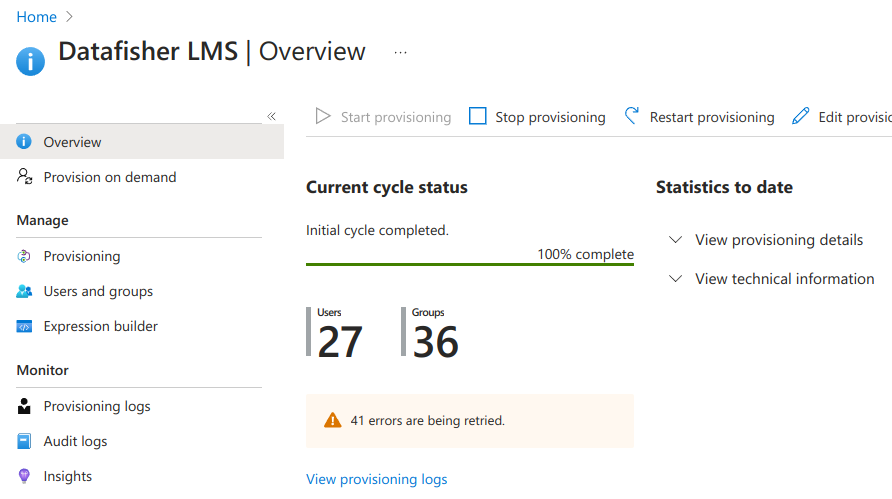
Next, navigate to the provisioning Overview page where you should see that provisioning has been enabled, but the initial provisioning cycle has (likely) not yet run.
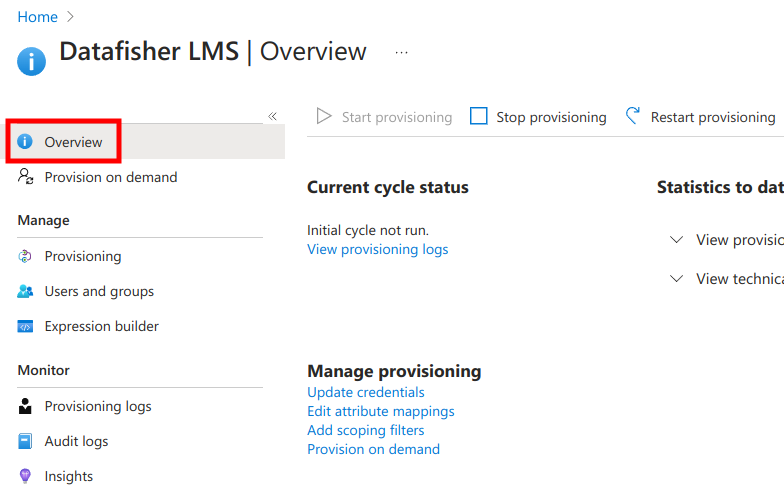
Finally, after a few minutes you should see the provisioning status. In case there are any errors, please contact Datafisher support.