Simple reports
Navigate: Menu > Reports
Simple reporting provides you access to basic reporting features.
By clicking on the "Advanced mode" button on the top right you can access the advanced reporting interface.
The content of all reports is limited by the permissions granted to the administrator viewing (receiving) them.
For example, when a user who has access to only Finnish users views a report about the whole company, they will see results only containing the Finnish users.
In this section
Set up parameters
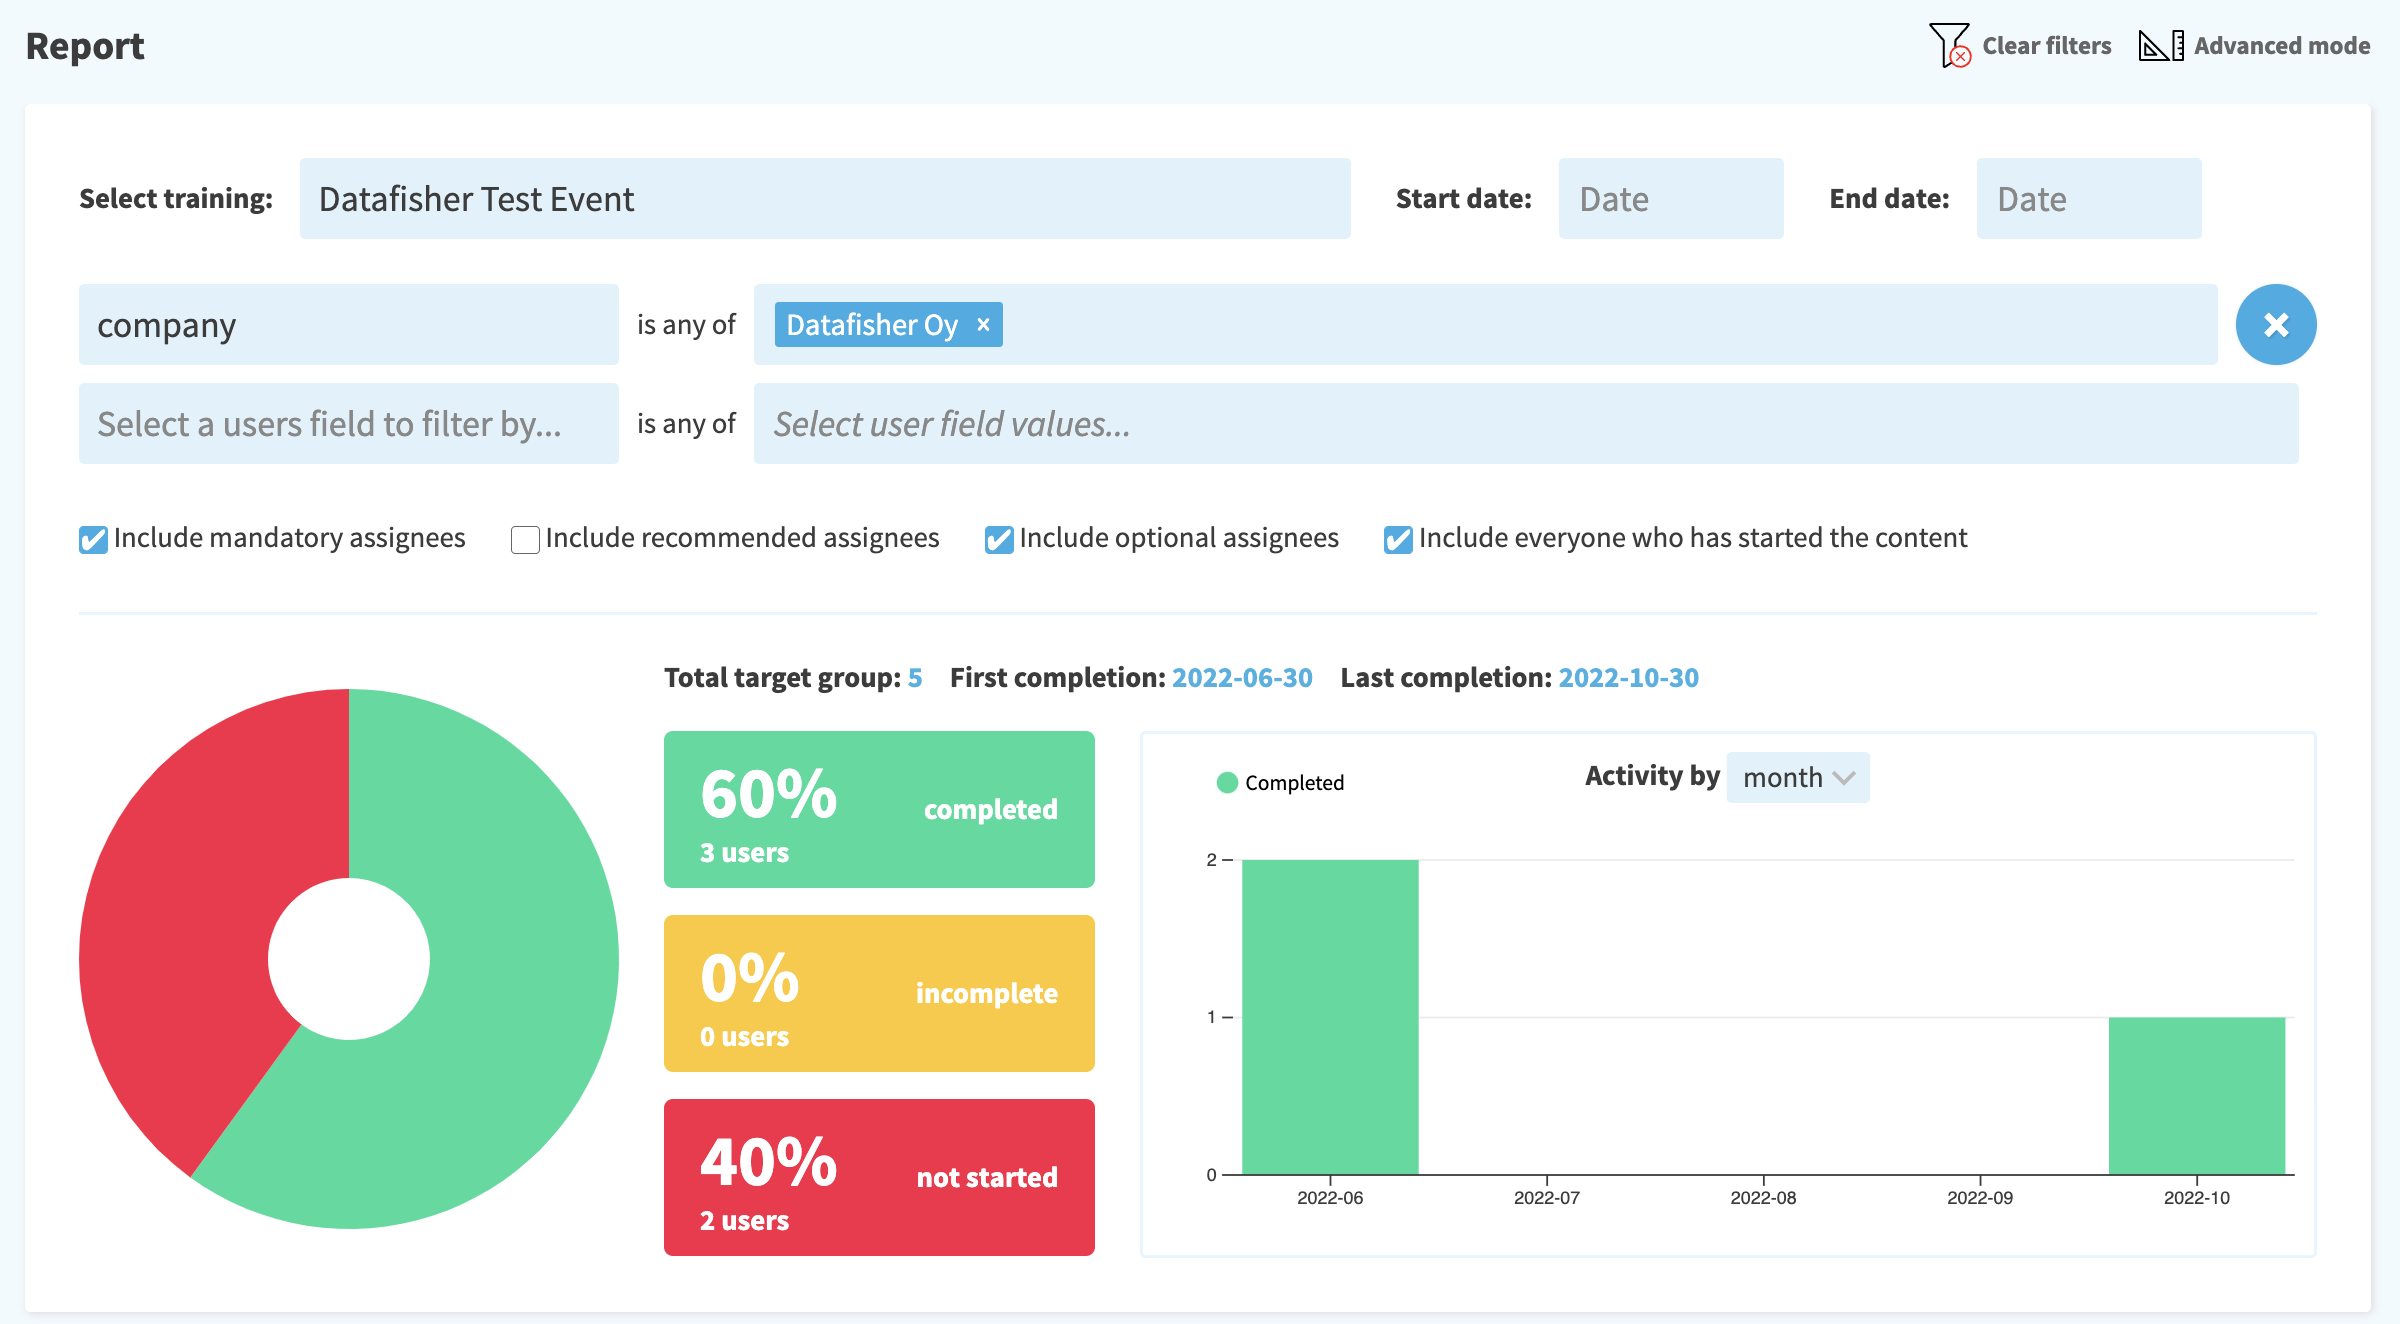
In order to view a report, you need to specify some parameters.

Training
First, you need to select the
Time range
Next, you can select a time range by setting start date and end date. Note that any users who have
Target group filters
Next, you can set different filters for the target group based on the user fields.
For example, show only users in a certain countries, departments, etc.
Select the field by which you want to filter from the left and one or more values from the right.
Assignment filters
Next, you can filter the target group based on the assignment type:
- Mandatory assignees – must complete the content
- Recommended assignees – the content would be useful to the users
- Optional assignees – the content can be taken at will
- Everyone who has started the content – regardless of assignment
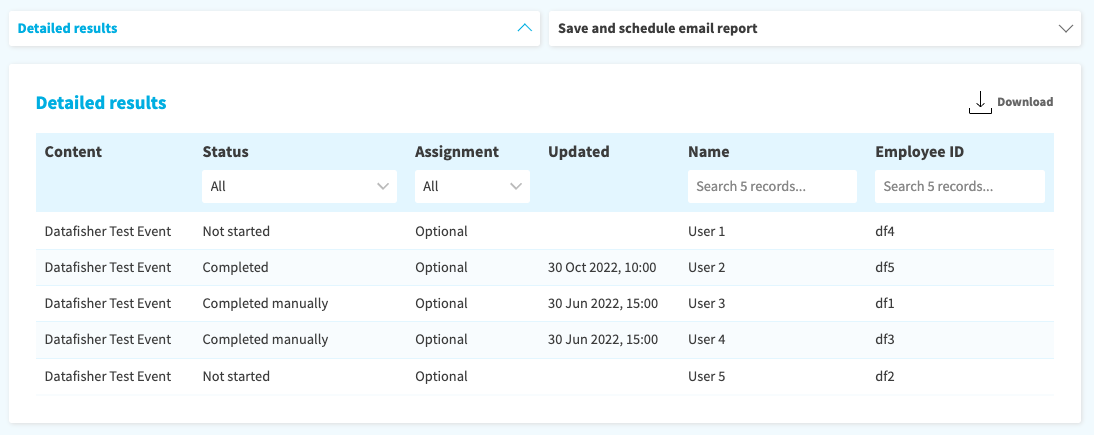
Detailed results
Here you can see a list of all users in the target group and their

The list can be downloaded in the Excel format by clicking on the "Download full" or "Download filtered" buttons. The former will download the full report along with all available user data, the latter allows you to select the fields to include.
Save and schedule email report
Here you can save the report as you have it currently configured and (if you'd like) schedule it to be sent to your or another administrator's email address.
The scheduled report is the same that can be downloaded from the "Detailed results" section.
This section consists of the following tabs:
- Save report – save the report as it is currently configured.
- Scheduled reports – review or edit the existing scheduled reports.
- Schedule new report – schedule the report to be periodically sent to your email address.
Save report
Before you save the report, make sure that you selected all the desired options.
- Name – enter here the name for your report, for instance, a name that will imply what this report is about or what is its purpose.
- Save as a new report and keep the old version as it is – (only visible when editing an existing report)
- Permission labels – select the ones that fit best.
You can find all saved reports from the saved reports page.
Scheduled reports
Here you can see the existing scheduled reports.
To edit a schedule, click on the relevant row, and to delete the scheduling click on its delete button.
Schedule new report
Here you can create a new scheduled report:
- Frequency – choose the frequency this report should be sent to the recipient: daily, weekly, or monthly.
- Day – choose desired the day of the week (weekly reports) or the day of the month (monthly reports) the report should be sent at.
- Hour – choose the desired hour the report should be sent at.
- Time zone – choose the time zone of the recipient.
- Recipient – choose the recipient of the scheduled report. Only LMS administrators can be the recipients.
- Fields to include – choose which report fields should be included. You can choose all fields or select only the desired fields.
The content of all reports, including those sent by email, is limited by the permissions granted to the administrator viewing (receiving) them.
For example, when a user who has access to only Finnish users views a report about the whole company, they will see results only containing the Finnish users.
If you are scheduling the report to be sent to someone else, make sure they have the relevant permissions or the report could be empty or partial.